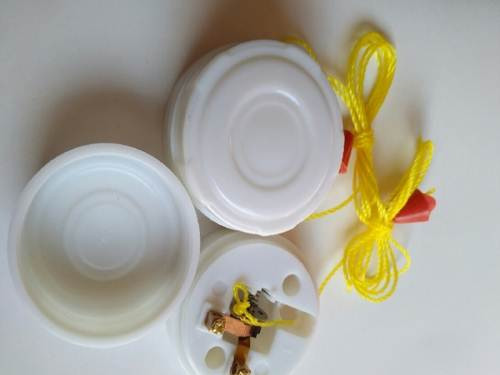
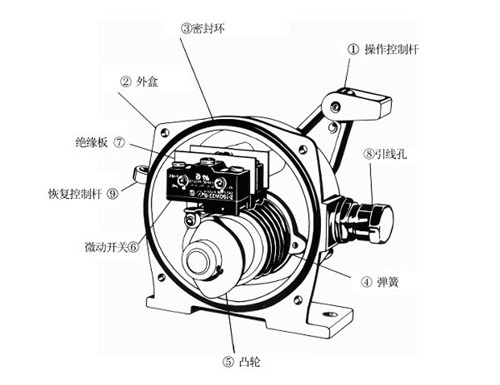
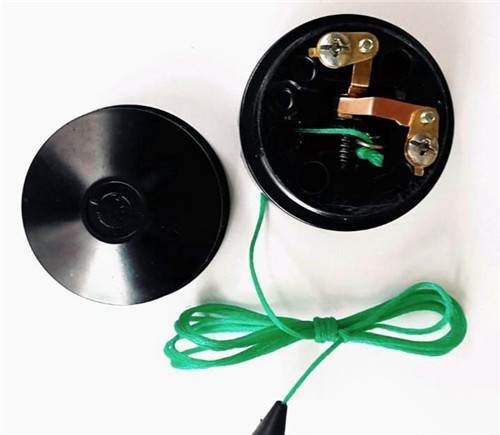
The switch plays a very important role in our lives, convenient control of the lighting switch, is also an integral hardware products. The pull-switches are believed to be familiar to many people and we used them only many decades ago. Today we will take a look at the introduction of the pull switch with the following content! Pull switch structure 1. The copper fork that will rotate will be bent and then installed on the top of the plastic roller. The copper electrode with elasticity will be pressed on the surface of the copper fork. This simple operation will form the positive electrode structure of the plastic roller. When the copper yoke is rotated along with the plastic roller, the ytterbium electrode will be fixed and will not rotate, but it will always maintain a good touch with the copper yoke. 2. Then press the iron on the other side of the plastic roller, and install the spring. This operation constitutes the back of the plastic roller. Because the iron of the dial wheel is affected by the power of the puller, the plastic roller rotates by itself, and the iron plate of the dial wheel can also be reset automatically under the force of the spring. 3. Finally, put the iron shaft into the assembly hole, and integrate the components contained on the front and back of the plastic roller, then install the assembled whole in the plastic shell and install the plastic shell on the switch base. The pull wire is attached to the electrode and the copper electrode, so that a pull wire switch is formed. Pull switch working principle 1. When the pull-wire switch is connected to the wire, it is usually connected to the position of the fire wire, and then the series connection of the light fixture is performed. Finally, the pull-wire switch is connected to the neutral wire. When we pull the cable, the switch disconnects itself, and the switch is connected to the fire wire at one end. The test is performed using a pencil and the light appears. The other end of the switch is to connect the lamp and the zero line. Check with a pencil, and no light appears. When we pull the cable again, both ends of the switch are self-connected, and the light emitting pen will appear. 2. The inside of the pull switch has a quadrant ratchet. The bifurcated parts contain metal settings. The other two sets do not contain metal settings. The pull wire and the trigger are connected, and the paddle controls the rotation of the ratchet. The angular velocity is At right angles. In addition, the paddle is also provided with a hook spring for resetting the switch. Above the ratchet, a metal connecting piece can be seen, which is connected into a level. By means of the switch, the current can be effectively controlled. Pull switch installation The distance between the pull-wire switch and the fixed position should not exceed 25cm. If there are two pull-wire switches installed, the distance between them should not exceed 47cm, and the switch protection level must be set at IP65. Since these switches can be installed indoors and outdoors, they are When installing, care should be taken to avoid direct sunlight and away from the acid-base area. With regard to the pull switch , Xiao Bian introduced it here for the time being, hoping to help you. If you want to learn more about the switch, you can pay attention to the information on this site, and more exciting content waiting for you. Switch pull switch Solar Light outdoor flood led ,Solar Floodlight,Solar Garden Light,Solar Street Light Shenzhen You&My Electronic Technology Co., Ltd , https://www.nbyoumysolarlight.com